

Key Takeaways
Why Tile Work Rewards Careful Preparation
Tile is one of the most durable finish materials available to homeowners, but its longevity depends almost entirely on what happens before the first tile is set. Mistakes in substrate prep, layout, or adhesive selection don't show up immediately — they emerge months later as cracked grout, hollow-sounding tiles, or entire sections that shift and lift. Understanding why each step matters helps you work with purpose rather than just following a checklist.
If this is your first major renovation, see our guide to tackling your first bathroom renovation for a broader look at sequencing trades and managing scope. And before you purchase materials, the home renovation planning checklist can help you confirm you haven't overlooked permits, lead times, or contingency costs.
Structural Soundness Comes First
Do not tile over a substrate that flexes, has rot, or is water-damaged. Movement in the subfloor will crack grout lines and eventually dislodge tiles entirely. If you notice soft spots, damaged cement board, or significant unevenness, address these issues before purchasing tile. In some cases — particularly in wet areas like showers — waterproofing membranes may be required by local building codes; check your municipality's requirements before starting.
Tile installation sits in a useful middle ground for DIYers: the core skills are learnable, the tools are widely available for rent, and the results are highly visible — which makes it satisfying when done well. Knowing where the skill ceiling is matters too. Just as some car repairs are genuinely within reach of a careful home mechanic while others require professional tools (see DIY car maintenance vs. taking it to a mechanic), tile work is similar: straightforward field tile is DIY-friendly, while complex wet rooms with waterproofing systems or large heated floors often benefit from professional installation.
Notched Trowel
Spreads adhesive in uniform ridges that compress evenly when tiles are pressed into place, ensuring consistent coverage.
Tile Wet Saw
Cuts tiles cleanly along straight lines and curves using a water-cooled diamond blade, essential for border and outlet cuts.
Rubber Mallet
Gently seats tiles into adhesive without cracking them, helping achieve a flat, even surface.
Tile Spacers
Maintain consistent grout-joint width across the entire installation for a uniform, professional finish.
Chalk Line
Snaps straight reference lines across the substrate to keep tile rows aligned over large areas.
Grout Float
Pushes grout into joints at the correct angle and removes excess without pulling grout back out of the lines.
Level (48-inch)
Checks that your substrate is flat and that tiles are sitting evenly as you work across the surface.
Tile Caulk (color-matched)
Fills perimeter expansion gaps and inside corners where rigid grout would crack from movement.
Step-by-Step: How to Lay Tile
Work through these steps in order. Skipping or compressing early steps — especially substrate preparation and layout — is the most common reason DIY tile jobs fail inspection or require costly repairs.
What you will need
Prepare and Inspect the Substrate
Before any tile touches the floor or wall, confirm the substrate is flat within 3/16 inch over a 10-foot span — the industry standard tolerance for most tile installations. Use your 48-inch level to sweep across the surface and mark any high or low spots with a pencil. Fill low areas with floor-leveling compound; grind down high spots with an angle grinder fitted with a grinding cup wheel.
Remove all dust, grease, and curing compounds. These prevent adhesive from bonding properly. On plywood subfloors, install cement backer board (screwed, not glued) before tiling. Check that all screws are set flush.
Find the Room's True Center and Snap Layout Lines
Locate the midpoint of each pair of opposite walls and snap chalk lines connecting them. Where the two lines cross is your starting point. However, before committing, dry-lay a row of tiles with spacers from that center point toward each wall. If a cut piece at any wall is less than half a tile wide, shift your starting point by half a tile to avoid slivers at the perimeter — these are fragile and look unfinished.
Once your adjusted center is set, snap final working lines at 90 degrees to each other. Verify the right angle with the 3-4-5 triangle method: measure 3 feet along one line, 4 feet along the other; the diagonal between those two points should be exactly 5 feet.
Choose and Mix Your Adhesive
The two most common tile adhesives are thinset mortar and mastic. Thinset (a cement-based powder mixed with water or a latex additive) is appropriate for floors, wet areas, and natural stone. Mastic (a premixed organic adhesive) is suitable for dry-area wall tile only and should never be used in showers, on floors, or under large-format tiles.
Mix thinset to a peanut-butter consistency — it should hold a notch when combed and not slump. Let mixed thinset rest (slake) for 10 minutes, then briefly re-stir before use. Discard any batch that has begun to skin over.
Set Tiles and Check Coverage
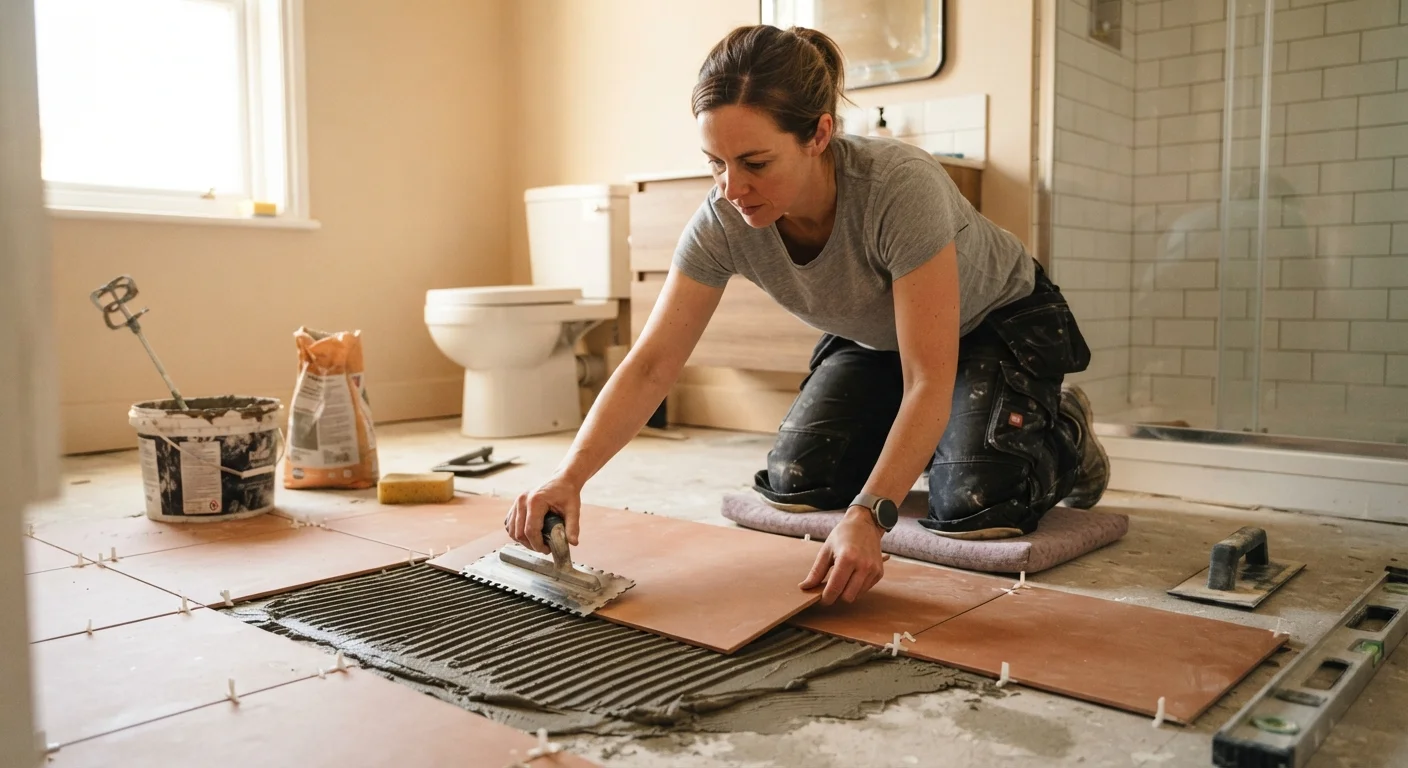
Working in manageable sections — roughly 3 to 4 square feet at a time — spread thinset with the flat edge of the notched trowel first, then comb through it at a consistent 45-degree angle. Press each tile firmly into place with a slight twisting motion, then seat it with the rubber mallet. Insert spacers at every corner.
Periodically lift a tile you've just set and inspect the back. Adhesive should cover at least 80% of the tile back in dry interior areas, and 95% in wet areas or on floors. Adjust your trowel notch size if coverage is insufficient.
Make Edge and Obstacle Cuts
Measure each cut tile individually rather than assuming the gap is consistent — walls are rarely perfectly parallel. Mark cut lines with a pencil or china marker. Use a wet saw for straight cuts and for cutting notches around pipes or outlets. A manual snap cutter works for simple straight cuts on wall tile but is less reliable on porcelain or natural stone.
Always wear safety glasses when cutting. After cutting, lightly sand sharp edges with a rubbing stone before setting the piece.
Allow Adhesive to Cure, Then Grout
Follow the adhesive manufacturer's cure time before grouting — typically 24 hours for thinset, though high-humidity environments may require longer. Remove all tile spacers before the adhesive hardens fully. Vacuum joints thoroughly to remove dust and debris, which weakens grout adhesion.
Mix grout to a thick paste and work it into joints with a grout float held at approximately 45 degrees, pressing firmly to pack joints completely. Wipe excess grout from the tile surface with a damp — not soaking — sponge in a circular motion. Rinse the sponge frequently. After grout hazes over (roughly 20–30 minutes), buff the surface with a dry cloth.
Fill perimeter gaps and inside corners with color-matched flexible caulk rather than grout. This accommodates the natural movement of the structure without cracking.
Use a Story Pole for Consistent Rows
A story pole is simply a straight piece of lumber marked with your tile width plus grout-line spacing. Running it along your layout lines before you mix any adhesive lets you visualize exactly where every row will land and flag any awkward cut sizes near walls or cabinets — before you're committed.
Don't Skip Expansion Gaps
Tiles expand and contract with temperature and humidity changes. Omitting perimeter expansion gaps — typically filled with flexible caulk rather than grout — can cause the entire tiled surface to buckle over time. This is especially common in heated floors and large-format tile installations.
Once your tile work is complete, the same planning mindset applies to other spaces. If you're thinking about updating the look of a room more broadly, our guide on decorating a room from scratch walks through how to build a cohesive design starting from a blank slate.